|
HP Photosmart R707 5.1MP Digital Camera Review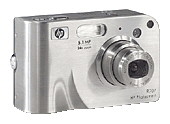
IntroductionThe Photosmart R707 is one of the latest additions to the HP line of small digital cameras and it incorporates a number of interesting features
HP R707 SpecificationsBriefly the R707 features:
A full list of the camera specs can be found on the HP Photosmart R707 specifications page. The HP Photosmart R707 digital camera comes supplied with a rechargeable lithium-ion battery (model R07), AC adapter, 2 USB cables (1 for PC, 1 for printer), and a printed User's Manual. The CD-ROM include HP Image Zone for Windows and Macintosh, HP Memories Disc Creator, ArcSoft Panorama Maker, and American Greetings Create and Print software. It has a 1-year limited warranty. Image Size and Quality SettingsThe R707 can record images in the following preset sizes and qualities. (Note: all file sizes are approximate and based on shots at ISO 100).
There are 4 quality settings
In addition to the preset options listed above, in the "custom" mode you can select any combination of resolution and quality, so, for example you could set anything between 5MP ****, which would be the highest possible resolution and quality and which would generate the largest file size (~ 2.25MB), or you could set VGA *, which would give the lowest resolution, highest compression and smallest file size (~ 87KB) The LensThe lens is a 3x optical zoom with a focal length range of 8mm to 24mm - which is approximately equivalent to a 39-117mm lens on a full frame 35mm camera. Maximum aperture is f2.8 at the wide and f4.9 at the long end (39-117/2.8-4.9). There appear to be only two apertures at any given focal length, wide open and stopped down. At the wide end you have f2.8 or f4.8, at the long end you have f4.9 or f8.4. While only two apertures sounds pretty restrictive, in fact with digital cameras using small sensors and continuously adjustable shutter speeds, it's probably enough. You have virtually no control over depth of field anyway since it's so large, so fine adjustment of aperture really isn't required. Shooting ModesThere are 11 shooting modes
In the "my mode" mode you can set all the parameters - ISO, shooting mode (any one of the other 9 still modes), EV compensation, image size and quality, white balance, adaptive lighting setting, sharpness, color, contrast, saturation, AE bracketing and date and time imprinting. The camera remembers these settings and uses them whenever you switch to "my mode". ISO settingsISO settings of 100, 200, 400 and "auto" are available. The auto mode seems to be very heavily biased to slower ISO settings, which seems to be typical for this class of camera. The reason is probably that noise certainly shows up at ISO 400 - again typical of small sensor cameras with small pixel size.
Above are 100% crops from sample shots at ISO 100, 200 and 400. You can see how the noise increases as the ISO setting is increased. White balanceThere are 6 white balance modes:
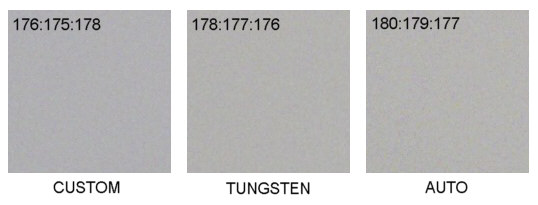
In manual white balance you first point the camera at a neutral target (sheet of white paper or a gray card), and store that as your "reference" color. Then when you take a shot the camera uses the same settings to determine what the white balance should be. In general the custom setting should give the best results, but takes time to set up. The next best should be the dedicated settings for sun, shade, tungsten and fluorescent lighting, and auto is usually the least accurate under difficult conditions. However auto has one BIG advantage. It works much better under all conditions than if you have a custom or dedicated setting set under the WRONG conditions! If you forget to reset from fluorescent to sunny when you move from indoors to outdoors, you'll have a problem! In fact auto works pretty well under all conditions and you can always to a little post processing in an image editor if the color balance isn't exactly what you think it should be. The white balance performance of the HP R707 is generally pretty good. below are shots of a neutral target shot under illumination from a 60W tungsten bulb. The numbers in the top left of each sample are the R:G:B values (which should be equal for a perfectly neutral target shot with perfect color balance). As you can see, there's very little difference between auto, tungsten and custom modes, which is very good performance.
Fluorescent lighting is probably the toughest to deal with since fluorescent lights come in many different types and most have a non-continuous color spectrum. Below is a test of the same neutral target under fluorescent lighting
This time I also used the "sunny" setting to show what happens if you have the WB set incorrectly! As you can see results aren't quite so good as with tungsten lighting, which isn't a surprise. The auto setting gives a green bias (fluorescent lights have a strong output in the green). The fluorescent setting does better. There's still a slight green bias but it's quite a bit less than on the auto setting. As expected, the custom setting gives the best result. Finally, below is a series of shots taken under heavily overcast skies using auto, shade and sunny white balance
Autofocus ModesThere is one focus zone, in the center of the image. Focus lock can be used by first pointing the camera at the subject you want in focus, 1/2 depressing the shutter, then while keeping the shutter 1/2 depressed, recomposing the shot to put the subject in another part of the frame.
In manual focus a scale is displayed on the left of the LCD but the display isn't magnified so telling when you have best focus is tricky. In macro mode the closest focusing (and maximum magnification) occurs at the wideangle setting, not the telephoto setting. The area covered at closest focus (max magnification) is approximately 2.5" x 3.5" (6.4cm x 8.9cm) Metering ModesThere are three metering patterns
HP gives no information on the size of the spot in the spot metering mode and there is no indication on the LCD of the area being metered ViewfinderThe R707 has an optical viewfinder in a addition to the rear LCD screen. Since the LCD consumes quite a lot of power, you'll get more shots if you use the optical viewfinder. While the optical viewfinder is clear, it lacks any diopter adjustment and it seems to be set for those whose eyes can focus quite close. While most SLRs seem to use an image set to a distance of about 1 meter, the R707 seems to be set to a distance of about 1/3 meter. My eyesight isn't bad, though I do use reading glasses. To get a sharp image from the R707 finder I needed my reading glasses on. As a comparison, on SLRs with no diopter compensation, I don't need reading glasses for a sharp image, so this does seem to be a "quirk" of this camera. It's not a big deal as the optical viewfinder is just an aiming device, not a focusing device, but it's a little annoying. LCD screenThe color LCD is fixed (i.e. it doesn't tilt or swivel). It has 119548 pixels (494 x 242) and is sharp and clear. There are three brightness settings - low, medium and high. The brighter the display, the more power it consumes, so if you don't need the brighter settings, don't use them.
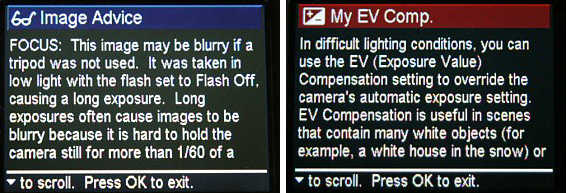
Data DisplayThe camera displays battery condition, estimated shots remaining, image quality setting, ISO setting, white balance setting, adaptive lighting mode, shooting mode, shutter speed and aperture. In playback mode it also displays filename, file size and data and time. There is no histogram display. Note that when remaining battery power is very low, the LCD display is automatically turned off to conserve power for shooting. This is fine, and doesn't happen until battery level gets very low, but when it happens you can't see the camera settings, aperture, shutter speed etc. In playback mode the image can be zoomed to 140x, a point at which you can clearly see the individual pixels. There's also a unique "Image advice" feature available during image playback. If the camera thinks maybe you made a mistake, or maybe you could have gotten a better shot using different settings, selecting "image advice" will bring up a screen with suggestions for improvement. If the camera doesn't have an opinion on your shot, it just says "There are no suggestions for this image". Below on the left is an example of the advice given when I deliberately took a long exposure shot without using flash.While it's nothing an expert wouldn't already know, it may be helpful for beginners.
There's also a help mode which explains most of the camera options. For example above on the right is the help screen associated with the EV compensation setting. Accessories
FlashThere are 5 flash modes:
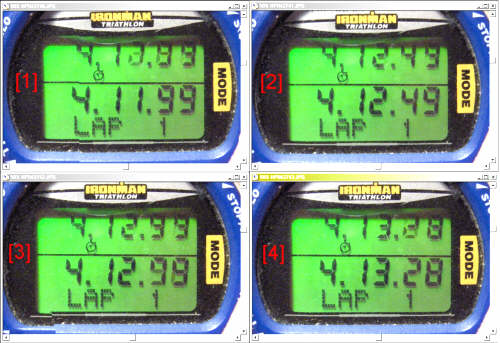
Flash recycle time is up to 6 seconds. Flash range is from 2.7m to 6m at the wide setting and from 1.5m to 3.25m at the tele setting, depending on the ISO setting. Timing IssuesThe HP R707 turn on pretty fast. It takes about 1.25 seconds for the lens to extend and you can certainly start shooting within 2 seconds of turning the camera on. In burst mode you can fire off 4 shots in about 1.5 seconds (5MP JPEG, low compression). It takes about 45 seconds to fully write all 4 images to memory, though you can start shooting again after about 25 seconds. At lower resolution and quality settings you still only get 4 shots, but processing is faster. Note that the specs and manual claim that burst mode gives you 3 frames at 3 frames/sec. I definitely got 4 frames with the following timing obtained by imaging a running digital timer with 1/100th second resolution. The two times are for two different runs. In each case the shutter speed as around 1/60s. The data for the second run is shown in the sequence of images below.
In single shot mode you can shoot something like 1 frame every 1 to 1.5s, though the LCD blanks after a shot, so you'll be shooting blind if you use the LCD rather than the viewfinder for aiming. If you wait for the LCD to refresh you can shoot a couple frames 2.2-3s apart. BatteriesThe supplied battery is a Li-ion battery. It charges while in the camera using the supplied charger. The camera can also use a Duracell CP1 disposable Li battery, which has the same form factor as the supplied Li-ion cell. HP claim the Li-ion cell will provide power for approximately 200 shots under "average" use and 100 shots with "extensive use of the LCD and flash". Charge time for the battery using the supplied charger and in-camera charging is 5-7 hrs for a fully depleted battery. In the optional docking station, charging takes 2.5-3.5 hrs and using the optional rapid charger, charging takes 1-2 hrs. SoftwareHP Image Zone software is included. This allows you to transfer images from the camera, view, edit, print or e-mail them. Also includes is HP Memories Disk Creator which allows you to write albums and slide shows to a CD. The editing software is pretty basic and if you anticipate doing any serious editing you'll certainly want more than HP provides. Other featuresAn audio file up to 60 seconds in length may be added to any image. The audio may be added at the time the shot is taken by holding down the shutter release, or it may be added later via the playback menu. The video mode has it's own start/stop button, so video is instantly available without having to go though menu selections. Note that the lens will not zoom during video recording, so select the desired focal length before starting video recording. Video recording is done in the MPEG1 format. The "adaptive lighting" function is interesting and useful. Basically it's a software feature that expends the cameras dynamic range by pulling detail out of very dark areas. There are three options for adaptive lighting, off, low and high. While you can do similar things in an external image editor (e.g. PhotoShop), in the R707 the algorithm works on the RAW sensor data, while if you do it post exposure you start with an 8-bit JPEG. Below is an example
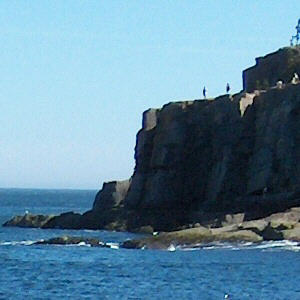
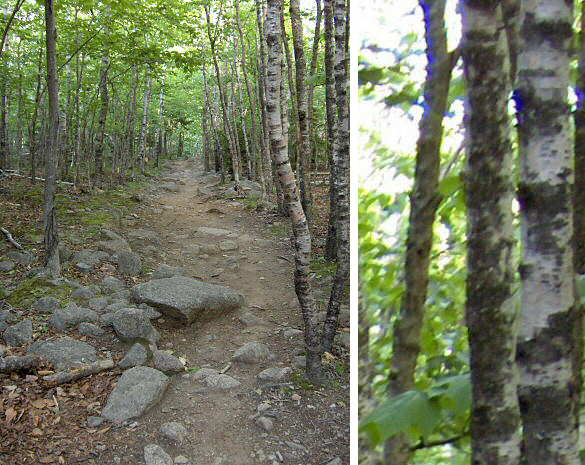
These are 100% crops from sequential full size images. On the left "adaptive lighting" was turned on, on the right it was turned off. On the left you can clearly see detail on the cliff face which is in deep shadow, while on the right very little, if any, detail can be seen. In-camera red-eye reduction works by first analyzing the image for candidate red areas, then doing a series of tests based on up to 60 different criteria to determine if any of the red areas are actually part of a human eye. Before removing red-eye a confirmation screen is presented allowing the photographer to accept or reject the changes to be made. Note that this is a selectable software feature which can be used in addition to the red-eye reduction pre-flash (also a user selectable option). Hyperfocal focus default. If autofocus fails, the lens is set to the hyperfocal distance so as to give maximum DOF and the best chance of getting the desired subject in focus. Direct printing from the camera. The Photosmart R707 supports both the Direct Print and Pictbridge standard for printing directly from the camera to compatible printers Image QualityImage quality is generally pretty good. The dreaded "purple fringing" seems to be pretty well controlled as can be seen from the following images:
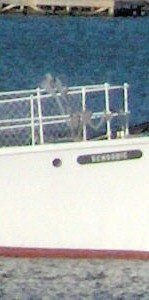
On the left is the full frame image and on the right is a 100% crop from the top right corner. You can see "purple fringing" in the very high contrast areas with bright (overexposed) sky against dark trees. These are extreme conditions of course. With more normal levels of brightness and contrast, "purple fringing" is not normally observed. This image was taken wide open (f2.8) at an 8mm focal length (equivalent to 39mm on a full frame 35mm camera). Chromatic aberration is also well controlled. The images below show the full frame on the left, and a 100% crop from the bottom right corner on the right. You can see that there is very little color fringing evident. The shot was taken at a focal length of 17.5mm (equivalent to 86mm on a full frame 35mm camera) and an aperture of f6.7.
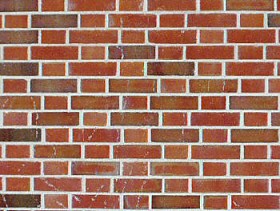
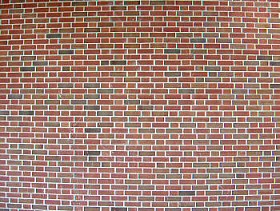
Distortion is very low at the tele end of the range, but significant at the wide end, as the images below illustrate.
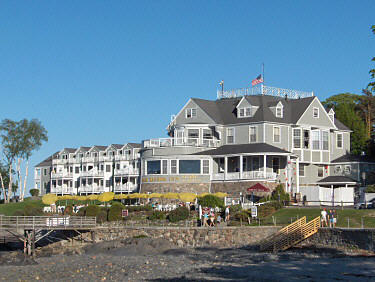
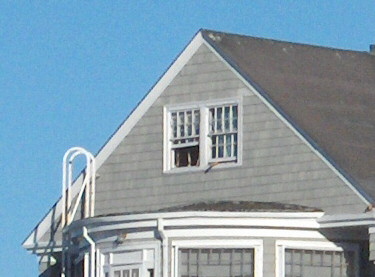
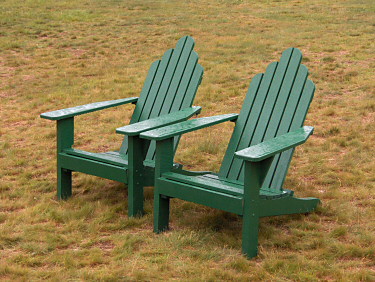
Above left shows very low distortion at the tele (117mm) setting. At the wide (39mm) setting shown on the right above, some distortion is evident Sample ImagesHere are a few sample images. In each pair, the upper image is the full frame shot and the lower image is a 100% crop from that image. The crops are directly from the image as shot in the camera with no post processing. the in-camera "medium" sharpness setting was used and they were saved using the high quality JPEG mode (5MP ***). (1) 1/998s, f6.8, 17.5mm (=87mm), ISO 100
(2) 1/87s, f3.6, 14.3mm (=70mm), ISO 200
(3) 1/800s, f4.8, 8mm (=39mm), ISO 100
What's good, what's not so good?Overall the camera performed well. There were a couple of things I didn't like. One I mentioned above was that the viewfinder seemed to be set with a virtual focus distance which was shorter than normal, so I needed reading glasses for a sharp image - something I don't need with a typical SLR. Not a big deal, and after a while you don't really notice it. From my observations, most users of this type of camera don't use the optical viewfinder anyway, they hold the camera at arm's length and use the LCD screen! Another little "quirk" was that the shutter release requires a firm press to release the shutter. At first I found myself moving the camera while trying to release the shutter. Again it's something you get used to after a while though and it's no big deal. The lens extends even when the camera is used in playback mode. This is a mixed blessing. It means you can't put the camera face down on a desk while reviewing images - but on the other hand it allows instant switching from playback to shooting mode just by pressing the shutter release. On the subject of the lens, it's just visible in the bottom right corner of the optical viewfinder at the widest zoom setting. No big deal but worth a mention (note that Leica rangefinder users will be quite used to this!). Other than that my only real complaints are those common to all small sensor digicams. Noise becomes noticeable at ISO 400 and the wide end of the zoom range isn't very wide (39mm equivalent in 35mm full frame format) - though with a static subject and a tripod you can shoot multi-frame panoramas and stitch them together in software, which can partially make up for the lack of a true wideangle setting. I like the inclusion of 32MB of internal memory. More than once I've picked up a camera and gone out shooting - only to find I'd left the memory card sitting in my computer! At least with the R707 you'll have 32MB of memory to work with on those occasions. I also like the size and weight (or lack of them), this camera easily slips into a pocket. The control layout and menu system are easy to use and logical and the image quality is good. ConclusionThe R707 is a very capable camera, with lots of options and available user controls. It can be used as a simple "point and shoot" camera by beginners, but allows the more experienced photographer to make choices of almost every shooting parameter. The built in "image advice" and "help" functions may be very useful for those just getting into digital photography (or any type of photography). Menu navigation is easy - though there are a lot of options so keeping the User's Manual around wouldn't be a bad idea until you get to know the camera. Overall I'd recommend this camera to anyone looking for a small and light, yet capable, 5MP digicam for general "snapshot" photography or as a small, light, backup camera for a DSLR owner. The HP Photosmart R707 sells [as of 02/04/05] at Amazon for $249.94 (currently with a free 64MB memory card plus $50 off an HP printer) it's also available with the optional Photosmart R-series dock - C8887A.
© Copyright Bob Atkins All Rights Reserved |
||

