

Ten Eleven Tips for Better Photographs
Yes, in the spirit of Spinal Tap, whose amplifiers could be turned up to 11 (that's one better than 10), here are 11 tips that might improve your photography. Most don't cost much - in fact most don't cost anything at all and most are equally applicable whether you're shooting with a basic compact digicam or a top-of-the line DSLR.
1 - Use a camera
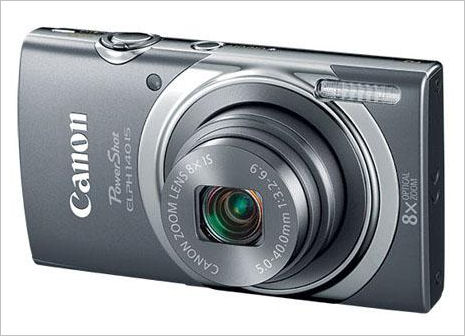
A camera like the Canon Powershot ELPH 140IS offers 16MP, an 8x optically stabilized zoom, HD video, ISO up to 1600, shutter speeds from 15s to 1/2000s. Can your camera phone do that? Plus it's a fraction of the cost of a smartphone at only $89 (as of 03/15)
It's not that you can't take pictures with your smartphone, because you obviously can, or that smartphone images can't be "art", because some people say they are, it's because the only real reason to use a smartphone is that it's convenient. The best camera is the one you have with you, and for many people that's a smartphone camera, but pretty much any digital camera will take higher quality images, is more versatile and will allow you more control.
Unless they are writing a book on how to use a smartphone camera, no serious photographer is going to pick a smartphone over a camera if they are going out to create interesting images. Well, no serious photographer who doesn't have a "thing" either about technology or about the lack of it. There's something a little ironic about taking low tech looking shots with something as high tech as a smartphone though! There is a school of photography (toy cameras, Holgas, Lomos, pinhole) that revels in simple equipment with no controls but that's more Art (with a capital "A") than photography and at least it's low tech all the way. And then there are Instagrams...
Real cameras don't have to be expensive (though they can be if you don't control yourself). In the world of small digicams you can pick up something basic for $100, for $150 you can pick up something pretty decent, for $200 you can get something that's pretty good. The best deals can often be last year's models that are being heavily discounted or cameras that have been refurbished by the manufacturer. If only the latest and greatest is good enough for you, then you have to pay for it of course.
Here are some examples of inexpensive but very capable cameras for around $200:
- Canon Powershot SX520 - 16MP, 42x Optical Zoom, 3" LCD Display, AV Output/HDMI/USB 2.0, 1080p HD Video, Optical Image Stabilization
- Nikon Coolpix L830 - 16MP, 34x Optical Zoom, 3" Tilting LCD, Hybrid Vibration Reduction, HD 1080/60i video with stereo sound
2 - Use a tripod
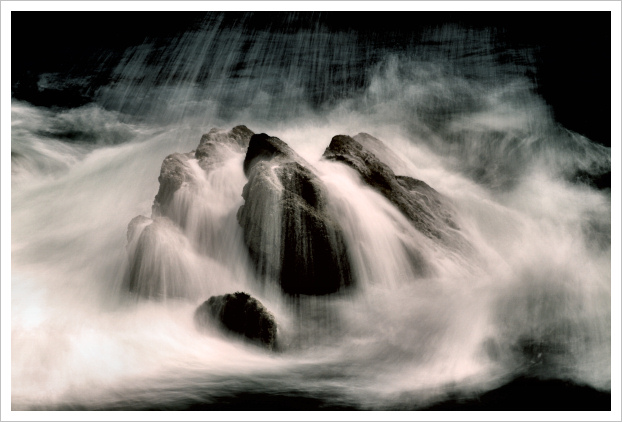
For long exposures like this one, a tripod is essential to hold the camera still
Yes, I know it's a pain the the neck (or back) to haul around a three legged monstrosity to sit your camera on, but it really can improve your shots. It does two things. First it stabilizes the camera. I know modern "wondercameras" and "wonderlenses" have image stabilization systems built in, but NONE of them are as effective as a good old tripod. Second, a tripod slows you down, gives you time to compose a shot, gives you time to think without having to hold the camera, let's you wait for that perfect light or perfect expression. A tripod is a good thing. Own one. Think about using it occasionally. While big and heavy tripods are needed for big and heavy lenses, small digicams and even small DSLRs can get by fine with low cost, lightweight tripods. Take a look at the Dolica 60" Proline or the Benro A-150EXU for example. If you have a P&S digicam rather than a DSLR you can even get a small tripod for under $10 - though don't expect it to be ultra stable at that price - see the Sunpak 5200D for example.
Note that very, very few smartphones (if any) have a tripod socket....but you can buy an adapter pretty cheaply - Joby JM1-01WW GripTight Mount
And don't forget that the quality and variety of your "selfies" can be vastly improved if you use a tripod to hold the camera when used in conjunction with a self timer or remote release.

3 - Use a lens hood

Left: No lens hood, sun just outside top left corner of frame Right: With lens hood
Lens hoods shade the front element of the lens from direct sunlight (or other illumination source) when the sun is outside the frame. This greatly lowers the chance of lens flare and ghosting (reduced contrast or "hot spots"). When the sun is in the frame, nothing helps.
If you don't have a lens hood and/or you can't attach one to your digicam, you can always shade the lens from direct sunlight with your hand or a hat. Just don't get them in the shot!
4 - Set white balance
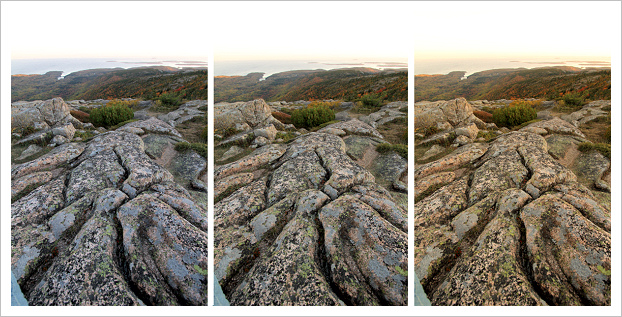
White Balance - Left: Auto Center: Shade Right: 10,000K
Auto white balance will try to make the colors in your image look natural, but it's not perfect. Most digital cameras also offer other white balance options, such as "Sunny", "Cloudy", "Shady", "Tungsten", "Fluorescent" etc. These aren't there just to fill up spaces in the camera menu. They're there to give you the option of tailoring the color response of the camera to ambient lighting conditions. Sometimes "Auto" works just fine, but sometimes one of the other options might give you an image closer to what you want. Advanced cameras will let you shoot a "RAW" image and apply white balance later, but most simple digital cameras shoot JPEG images, which have the white balance fixed at the time of shooting.
Most Auto WB systems have trouble in indoor lighting. Take a test shot, check the color of the image on playback and try the "Tunsten" and "Fluorescent" WB settings if you don't like the Auto colors. Some cameras have a "custom" setting where you first shoot an image of a white or grey card, then the camera uses that as a reference and adjusts the white balance accordingly. That's the most accurate method if you want "true" colors. Of course you may not want "true" colors. Most people prefer warmer colors for indoor shots, but that's up to you to decide.
5 - Position the subject
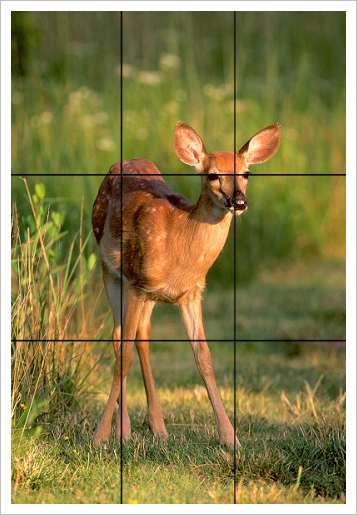
Looks about right for the "rule of thirds", though I actually just shot what ! thought looked good at the time
Otherwise known as composition. There's a tendency, especially with a camera that has its main focus zone in the center of the screen, to center the subject. Sometimes this works, for example when photographing a symmetrical pattern, but often it gives rise to a very "static" image. There's an old rule of composition called "the rule of thirds". There are four points in the frame where lines dividing it into thirds cross. As a rule of thumb (i.e. if you have no better ideas), try placing the subject on one of these "thirds" intersection lines (upper right, lower right, upper left, lower left).
Of course rules are made to be broken, just make sure that if you decide to break them, you have a reason for doing so.
6 - Look at the edges
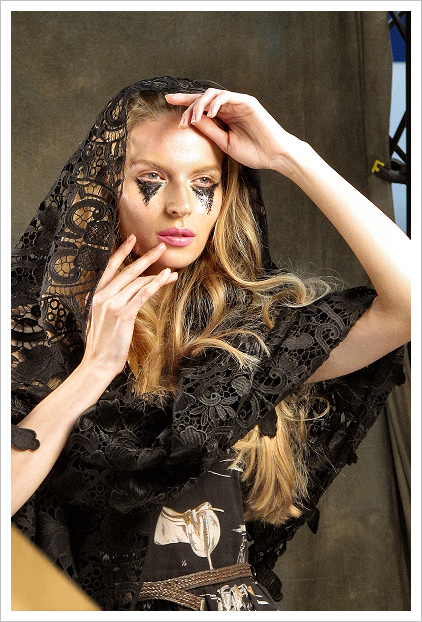
Oops...didn't notice that when I was shooting!
We all tend to concentrate on the main subject of our photographs - and that's good - but we tend to ignore what's at the edges and in the corners - and that's bad. Before you press the shutter release (or tap the screen), look around the edges of the image. Any old socks on the floor? Is the trash can in the shot? People walking by? It can save a lot of cropping and editing later.
And don't ignore what's directly behind the subject either. We've all seen portraits of people who appear to have trees or lamp posts growing out of the top of their head!
7 - Select the aperture/shutter speed
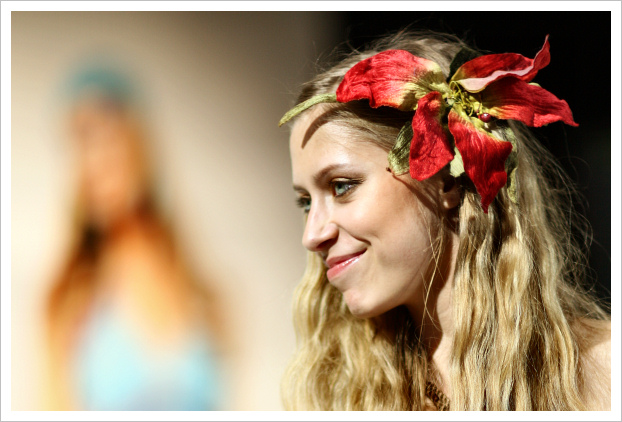
Using a wide aperture allowed the distracting background to be blurred out
Some cameras are fully automatic and they don't allow the user to make any decisions about shutter speeds and apertures. They pick an exposure and that's what you get. However many cameras (even inexpensive cameras) allow the user to select aperture (usually in a mode called "Av" for aperture value) and/or shutter speed (usually in a mode called "Tv" for time value). Manual mode "M" allows you to set both.
If you want a scene with everything from far to near in focus, you want to use a small aperture. Many digicams won't go to anything smaller then f8, but larger sensor cameras may allow apertures of f11, f16, f22 and even f32. Small apertures will require slow shutter speeds for correct exposure, so that's where tip #2 (use a tripod) comes in!
On the other hand if you want to isolate the subject by blurring the background you want a large aperture. Depending on the camera this may be f1.4, f1.8, f2, f2.5, f2.8 etc. Shutter speeds will be faster, so a large aperture is also good for freezing action (e.g. sports photography). Large apertures also allow the use of lower ISO settings, which can reduce the noise in an image.
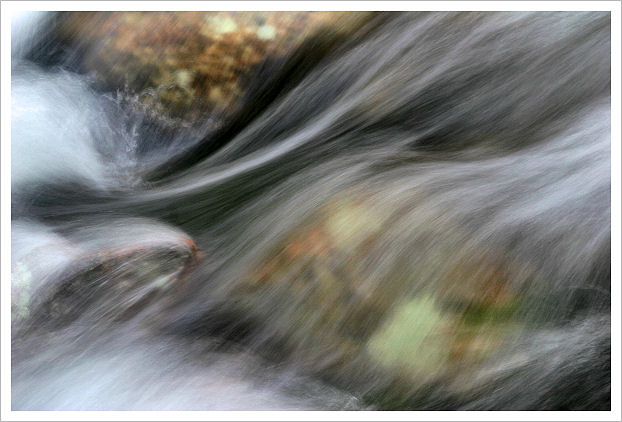
A shutter speed set to 1/2s blurs the motion of the water
Sometimes you might want a slow shutter speed to deliberately blur motion. Another case where a tripod is just about essential.
8 - Use scene modes

Scene modes may enable you to take shots that you couldn't otherwise if the camera has no manual controls
For example "Fireworks" mode may enable a shutter speed of several seconds which a shot like this one requires
Though all cameras may not allow control of shutter speed and aperture, most will have "Scene" modes. They modify the choices the camera makes about what aperture and shutter speed to use. For example in portrait mode the camera will try to keep the aperture wide, while in "landscape mode" it will probably try to use a small aperture. In "Sports" mode it will try to use a fast shutter speed. Generally, a scene mode will give results which are as good as or better than the camera's default "program" or "auto" mode. Some modes, such as "underwater" will also adjust the white balance outside the normal range of the "auto white balance option. Modes such as "fireworks" will leave the shutter open for several seconds, an option that might not otherwise be possible on some cameras. So if you know what type of scene you're shooting, try a scene mode.
9 - Wait for good light
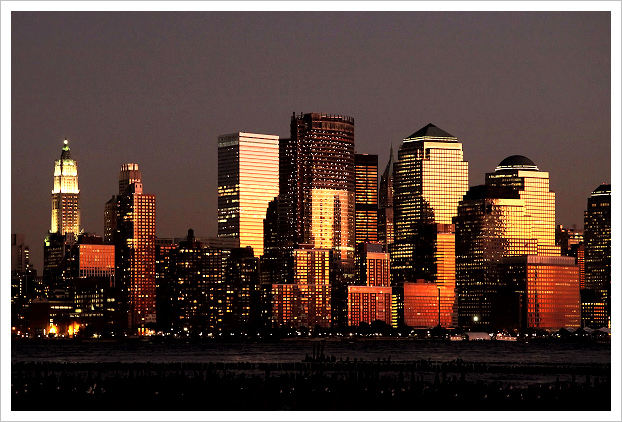
This was just another fairly boring NYC cityscape until the setting sun was reflected off the buildings
Lighting makes the picture. You can shoot exactly the same scene in two different lighting conditions and end up with one image that's superb and another that's only really fit for the trash can (or delete button). Generally speaking the worst possible light for photography is with the sun overhead on a clear day. The light is bright, yes, but it's also very harsh, very directional and shadows will be dark and cold. For portrait type work it's a disaster and for most nature shots it's the worst light to use.
The best light can either come on a slightly overcast day or around sunrise/sunset. On an overcast day the light is diffuse and shadows aren't strong. This works well for portraits and nature macro shots. For landscapes (and portraits), the soft warm light of the rising and setting sun often work best. If you must shoot at high noon you can think about things like fill flash and reflectors to throw some light into the shadows. Only works for subjects not too far from the camera though, you can't fill shadows via flash when shooting landscapes!
A rule of thumb for nature work is to rise with the sun and shoot for a few hours, then rest and eat during the middle of the day, then get back out in the field and shoot until the sun has gone down. Doesn't apply if it's raining of course.
10 - Take multiple shots
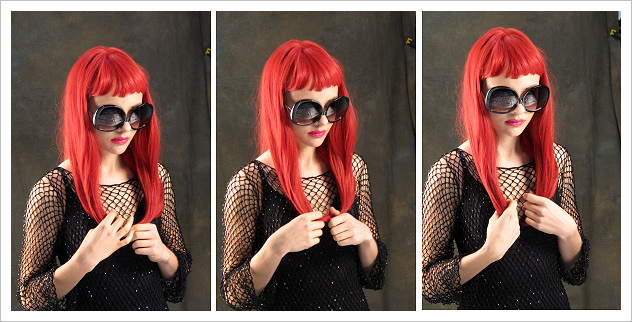
Digital shots are (almost) free. Take a bunch and pick the best one
Digital is free. Well, not free, but it's not like you are paying $12 for a 36 exposure roll of film to be developed. So you can afford to take two or three shots of every scene. You can try different exposures or different aperture setting. If you're shooting at slow shutter speeds where camera shake might blur the image, you're changes of getting one sharp image are 5x better if you take 5 shots. If you don't know whether a portrait or landscape orientation of the camera (horizontal or vertical) will give you the best shot, take a couple of each. Digital memory is cheap. Use it. When you can get a 300x 16GB SDHC UHS-1 card for under $8 (as of 03/15), there's no excuse for not taking extra shots - Transcend 16GB SDHC Class 10 UHS-I 300X. A 16GB SDHC card will typically hold 2000-3000 highest quality JPEG images from a 16MP camera.
11 - Use RAW if you have it
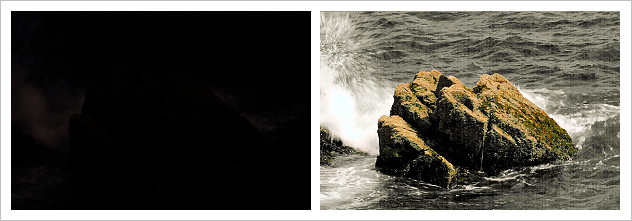
Left: JPEG as shot by the camera Right: RAW image processed to give best image
Some cameras, usually the more expensive compact digicams and just about all DSLRs allow you to shoot in RAW mode. in RAW mode, the image file is simply a record of the intensity of the light falling on each pixel of the sensor. The camera makes no judgment about what the white balance should be, what sharpening to apply, how much noise reduction to use, what tone curve (contrast) to select ow whether or not to apply and corrections for lens aberrations like distortion. You just get the RAW data.
You can then process that RAW data into a normal JPEG image file using software usually supplied by the camera maker. You can decide what color balance looks best, how much sharpening to use, how saturated to make the colors etc. You can even change the exposure slightly without burning out the lighter areas or losing detail in the deep shadows. In short shooting RAW gives you a lot more flexibility and can allow you to recover a shot taken with incorrect exposure that would have resulted in a useless JPEG straight from the camera.
Most cameras that will shoot RAW also allow you to save each image as a RAW file and a JPEG file. That way you have the RAW file if you need it, but you also have the JPEG file if you don't want to take the time to deal with processing the RAW file. The only downside to shooting RAW or RAW+JPEG is that it uses quite a bit more memory than just shooting a JPEG file. Where you might get. say, 2200 images on a 16GB memory card shooting JPEG images, you might only get 250 images stored as both RAW and JPEG.
12 - Read the manual
Yes, not just 11 tips but a bonus tip as well. Read the manual, even if it is only available in .pdf form (camera manufacturers are getting so cheap these days that a printed manual is becoming a rare find). Modern digital cameras are complex devices. Some have so many different modes and options that you will never find all of them by chance. I know most manuals seem to have been written by someone who has never used the camera (or who has used it so often that they assume you know where everything is and what it does) but still the manual is the best source of information on camera operation you are likely to find. And it's free. Make it your bedtime reading for a few nights.
So there you are. These tips aren't going to turn you into Ansel Adams (for younger readers, he's the quintessential B&W landscape photographer of the 20th Century) or a Nigel Baker (for older readers, he's TV's "America's Next Top Model" photographer), but if you observe all of them they're likely to improve your images (and mine). Give them a try.
