
Fixed mount Astrophotography with a camera and lens

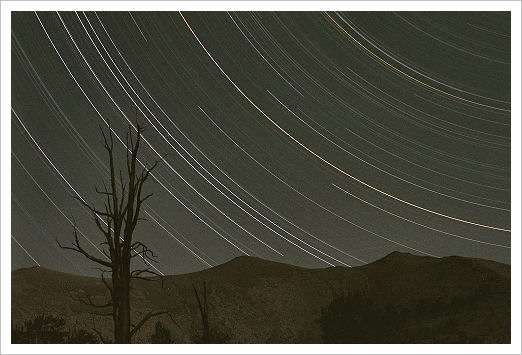
Star Trails © Philip Greenspun. 6hr exposure on ISO 50 color film at f4 with a 60mm lens
I'm sure everyone has seen start trail pictures like the one above. You find a place with really dark skies, point the camera at the sky and make an exposure lasting from a few minutes to a few hours. Generally you would use the lowest ISO setting available on the camera. Exposures can range from minutes to hours, limited only by sky darkness and camera noise levels.
There are lots of websites which describe star trail photography and detail the techniques so I'm not really going to concentrate on those here. What I am going to describe in a little more detail are a few techniques for photographing celestial objects that don't result in trails, i.e. "instant" pictures which give a snapshot of the sky, the stars, the planets, the sun or the moon. All are possible with the same cameras and lenses you use for normal photography and no extra equipment is needed (apart from a tripod and you should have one of those anyway!).
What lens? What focal length and aperture?
So what focal length lens do you need? Well, it depends on what you are trying to photograph. For the stars, any focal length is fine. A surprising fact to many is that faster lenses don't necessarily record fainter stars. This is because stars are point sources and result in a point image. In this case it's the physical aperture of the lens which determines how faint a star can be recorded. Physical aperture is given by focal length divided by f-stop. So a 50mm lens at f2.0 has a physical aperture of 25mm. A 200mm lens at f4 has a physical aperture of 50mm and a 300mm lens at f2.8 has a 107mm physical aperture. This means that an 85mm f1.8 lens will record fainter stars with a given exposure than a 50mm f1.8 lens will. Some of this advantage is negated if you have to use a shorter exposure with the 85mm lens to prevent stars trailing, but even after that is accounted for, the 85/1.8 still has the advantage...however, for nebulae (which are extended objects), a faster f-stop lens will record them better.
Using the lens at maximum aperture will show fainter stars, but stopping down a stop will usually give sharper images and stars near the edges and corners won't be "smeared out" as much. What aperture you use really depends on how good the lens is. High quality medium and long focal length prime lenses might be fine wide open, whereas wide angle lenses and zooms may show sharper edge and corner stars when stopped down a stop.

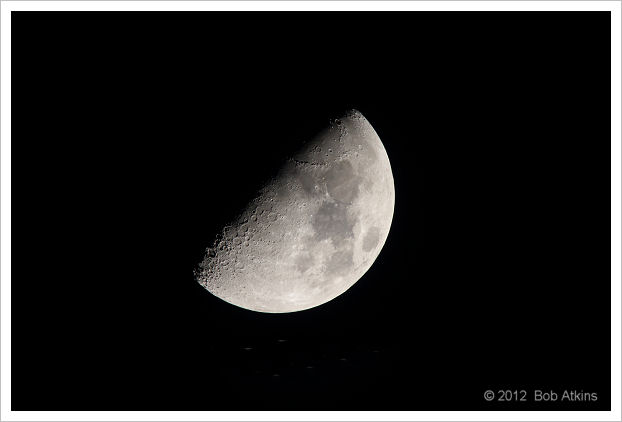
The moon at 1000mm. Uncropped image from an EOS 7D (APS-C format)
For the moon, sun and planets, you'll need a telephoto lens. With a 1000mm lens (normally achieved using a 500mm lens with a 2x TC), you can get good images of the whole sun and moon which fill a substantial portion of an APS-C frame. However with the planets, they will be a tiny spec no matter what lens you use. In reality you'll probably end up using the longest, fastest lens you have. Since the sun, moon and planets are extended sources rather than points, the usual f-stop relationship applies, where the faster the f-stop, the shorter the exposure needed.
What Shutter Speeds can be used?
Professional and advanced amateur astrophotography is done using a tracking mount. Due to the earth's rotation the stars appear to move across the sky. At the celestial equator they appear to move 360 degrees in about 24 hours since that's how long it takes the earth to rotate once. This means they move at a speed of 15" (15 seconds of arc or 15/3600 of a degree) per second. For the purposes of this article, when exposures are short the sun, moon and planets can be assumed to move at the same rate. If an exposure is longer than a few seconds with a normal lens, the apparent motion of the stars causes them to be recorded as trails rather than point sources. To prevent this astrophotography tracking mounts move the camera very slowly so as to exactly cancel out the apparent movement of the stars. This means you can take long exposures and the stars stay as point sources without trailing. Such mounts are expensive, so I'm going to describe what you can do with an ordinary fixed tripod.
A fixed tripod means that exposures have to be short so the stars/sun/moon/planets/etc. don't form trails. Just how short depends on how you view the image. The closer you view it the shorter the exposure has to be. The following table shows maximum exposure length for a couple of cases.
Focal Length |
Critically Sharp. > 1 pixel movement |
"Sharp enough" for small prints? |
| 1000mm | 1/20s | 0.5s |
| 500mm | 1/10s | 1s |
| 300mm | 1/4s | 2s |
| 200mm | 1/3s | 3s |
| 100mm | 1/2s | 5s |
| 85mm | 0.7s | 7s |
| 50mm | 1s | 10s |
| 35mm | 1.3s | 13s |
| 28mm | 1.7s | 17s |
| 24mm | 2s | 20s |
The most critical case is where you allow the image to drift by no more than 1 pixel (based on the use of an 18MP Canon EOS 7D APS-C DSLR). The "Sharp Enough" case is where you allow around 10 pixels drift, which would be unlikely to be visible in small prints made from the whole image (i.e. uncropped images).
Note that these are "worst case" numbers. As you move from the region of around celestial equator (where you find the sun, moon and planets) to the north and south celestial poles, the apparent motion of the stars slows down. A star exactly at the celestial north pole wouldn't move at all. Polaris (the North Star) isn't quite at the pole so it does move a small amount, but much less than stars distant from the pole.
Focusing
Back in the days of film SLRs and even with early DSLRs the only way to test focus was via the via the viewfinder screen. When focusing on stars and planets, even with an eyepiece magnifier, this was no simple task. Today, with live view being common on most current DSLRs the situation is much easier. By far the best way of ensuring precise focus is by manually focusing the lens and using live view and maximum image magnification and observing the image on the LCD screen. While it is possible to use AF on subjects like the moon, it's still better to go with manual focus and live view.
Exposure
DSLRs make determining exposure easy. First take a guess, perhaps based on the data provided for sample images here or on the rough guides to exposure provided. Then check the image and the image histogram and adjust exposure accordingly. Generally it's better to err on the side of underexposure rather than overexposure and it's always better to record images in RAW format. RAW format allows far more extensive manipulation of brightness, contrast, color, noise reduction etc. than JPEG format does.
With long focal length lenses, camera vibrations induced by the movement of the reflex mirror of a DSLR can cause some image bluring. If shooting in normal mode, the use of mirror lockup is desirable if it's available. Failing that some cameras will prefire the mirror when using the timer function, the the mirror flips up several seconds before the shutter opens and closes. In live view most DSLRs keep the mirror up all the time so mirror induced vibration isn't an issue. However it's still necessary to either use a self timer of a remote release so that you don't induce vibration by touching the camera.
Seeing, Multiple Images and Image Stacking
There's a term "Seeing" which used by observational astronomers to describe the optical condition of the atmosphere. When you're looking out into space the optical path is though the whole of the earth's atmosphere and the earth's atmosphere is turbulent. We've all seen "heat haze" on a hot day causing distant objects to shimmer. Well the same thing happens all the time when looking with high power telescopes (and lenses) looking out into space. It's what makes stars "twinkle".
Moon from Bob Atkins on Vimeo.
When observing stars and planets this turbulence moves the image around slightly and can also bring it (or parts of it for an extended object) in and out of focus. Thus two images taken only fractions of a second apart can look quite different. One may be sharp, and the other blurred. The brief video above shows how this affects and image of the moon's limb.
In order to capture those fleeting moments of high atmospheric clarity and steady seeing you have to make a lot of exposures and chose the best one or ones. Just because you have the focus correct and the exposure correct doesn't mean every image you shoot will be equally good. The more you take, the higher the chance of everything coming together at the moment of one or more of the shots. So the rule is to take lots of shots.
To take this even further, a current technique for amateur telescopic imaging of planets is actually to shoot video. A 10 second video clip may then contain 300 or more images. There are programs which can then take those 300 image frames, align them, decide which are the best and then stack them together to reduce noise and bring out detail. One such program is Registax. It's freeware and it's a very powerful tool. It's not the most intuitive an user friendly piece of software though and it can be intimidating at first, but if you want a copy you can download one from http://www.astronomie.be/registax/index.html. Amateur astronomers use telescops attached to cameras with small sensors and small pixels to record the maximum amount of detail. Since typical planetary images shot with camera lenses will be very small, shooting video with most DSLRs is less than ideal because of the large amount of empty space and because the individual frames are typically downsized from the sensor. Many amateur astronomers use webcams attached to telescopes. Some DSLRs do have the ability to record video in a "zoom" mode using only a subset of the sensors pixels without downsizing. In those cases shooting planetary video with a DSLR could be practical.
Well, that's the theory. In Part 2 of this article I'll show some actual examples with comments on how to photograph the Moon, Sun, Planets and Stars.
NEXT --> Part II. The Moon, Sun, Planets and Stars
