

Astrophotography with a camera lens and a fixed tripod - Part 2
The Moon

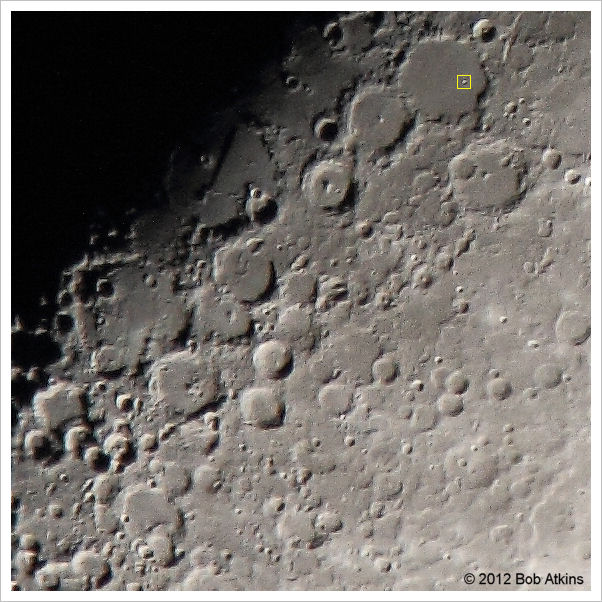
Moon, first quarter. Canon EOS 7D, 500/4.5L lens + 2x TC. 1/50s @ ISO 400
The Moon is probably the easiest and most interesting celestial object to photograph with a camera and lens. It's bright, it's large, it changes every day and the surface has lots of detail. Photography of the moon can be done with the simplest equipment. Any moderate telephoto lens and any tripod should be good enough to get pleasing images.
Since the moon is about the same distance from the sun as the earth it gets about the same amount of sunlight that we do, so exposure values for the moon are abound the same as you would use for daylight exposures on earth. However just as on earth exposure changes from sunrise to noon to sunset and when you look at the moon different parts are at different times of the lunar day. The area between dark and light (known as the terminator) is at lunar dawn or dusk. For the full moon, the center of the disk is at lunar noon. This means that exposure is often a compromise. For the quarter moon (1/2 of it illuminated) a good place to start is with an exposure of around 1/100s at ISO 400 and f9. For the full moon you need about 2 stops less exposure, which would be around 1/400s at ISO 400 and f9. For a very thin crescent just after new moon you can try 2 stops more exposure, which would be 1/25s at ISO 400 and f9.
Images of the moon can often be blown up to a large size while still retaining detail. Below is a 100% crop from an image taken with a 500mm lens - 2x TC using and EOS 7D. The smallest features visible are on the order of 5km across. The small crater in the yellow box at the upper right is called Ptolemaeus A (also known as Ammonius) and is listed as being 9km in diameter.
You can get more colorful images during a lunar eclipse (when the earth passes between the sun and the moon). Eclipses can be partial of total, umbral or penumbral and the color of the moon can vary from a pale pink to a deep, dark red. At the peak of some total lunar eclipses to moon can almost vanish. This makes giving exposure suggestions very difficult. Below is an example from 2008.
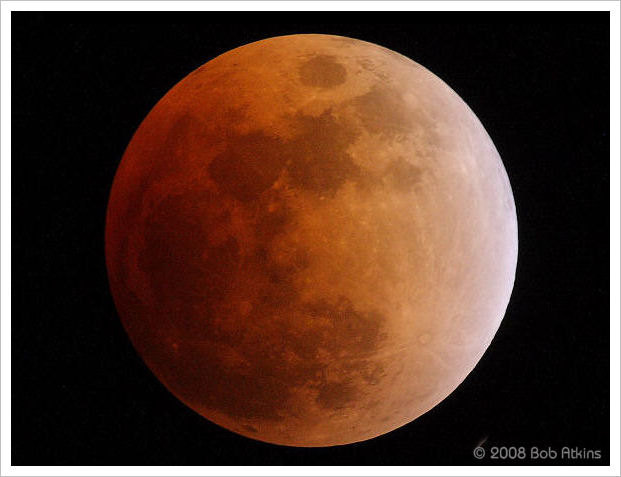
February 24th 2008. 700mm lens, 1s exposure at f7.1 and ISO 400
The Sun

The sun on 02/03/2012. 1/200s at ISO 200. 1000mm @ f9. Metallized Glass Solar filter, OD=5
The sun is easy to photograph with the right equipment. It's big so you don't need an ultra telephoto lens and it's bright so you can use very short exposures and don't have to worry about movement. The only problem is that it is VERY bright, in fact dangerously bright. To photograph the sun you need a filter that's built for the purpose of solar photography or visual solar observing. These are usually a metal film deposited on either optical quality glass or very thin mylar. On the scale of prices for photo graphic filters, solar filters are not particularly expensive. However they are normally made to fit telescopes rather than lenses, so they don't usually have "screw-in" mounts. Some adaptation is usually needed to use them with camera lenses. However Thousand Oaks Optical do have a line of "black polymer" solar filters in threaded mounts up to 82mm in diameter. The 77mm and 82mm filters are currently $59 plus $10 shipping). These filters are thick plastic rather than glass so their optical quality may not be quite as good as the metalized glass filters or the very thin aluminized mylar filters.
One general word of warning here. The filter MUST go over the front of the lens and be securely attached. Many long telephotos have small rear mounting filters and even if you found a solar filter that would fit, you should NOT use it in a rear mounting slot. The heat of the sun concentrated onto the small filter by the lens could cause it to shatter.
For photography and visual use you need a filter with an optical density of about 5, which will let about 1/1000th of 1% of the light through. The darkest "normal" photographic ND filter that I own is a Hoya NDx400. An exposure with the NDx400 requires an exposure 400x longer then without the filter. That's about 9 stops and the filter lets through about 1/5th of 1% of the light and absorbs the rest. For an acceptable exposure of the sun when it's high in the sky I found that 1/8000s at f45 and ISO 100 was required. Clearly it's not really dense enough for solar photography. A solar filter designed for both visual and photographic use is more like a 100000x filter, or close to 17 stops. Solar filters also reflect the light (and heat) rather than absorb it. They reflect 99.999% of the light and let 0.001% through. You can get either aluminized mylar filters or metal-on-glass filters. The glass filters are more durable. They are available is sizes from about 4" in diameter all the way up to 8" and more, but the smaller 4"-6" filters will fit over the front of most long telephoto lenses and they're priced from from $60-$100. For purely photographic use you can use a physically similar but less optically dense filter designed for photography only, something with an optical density around 3 to 4, i.e. one that transmits about ,1% to .01% of the incoming light. This allows very short exposure times, but it is not safe to look at the sun through by eye though such a filter. Note that an filter with an optical density of 5 (OD5 or ND5) is very, very dark. Some photographic filters may be sold with a designation like "ND5x" meaning they increase exposure time by a factor of 5 or maybe by 5 stops. That's very different. Basically if you can see anything through the filter looking at anything but the sun, it's not dark enough for visual use.
The sun changes from day to day. Sunspots (when present) grow and shrink while they move across the sun's disk. The sun at the equator rotates once every 24.5 days so spots move from one side to the other in about 12 days. The darkening at the edges of the sun that you see in the image above is real and is known as "limb darkening" and occurs because at the edges of the disk you are looking at (and though) a part of the sun that's cooler and less dense then the interior (or as far as you can see into the interior).

Progress of partial eclipse of 1994 as seen from New Jersey. 1000mm lens. Shot on film, no exposure details recorded
This was seen as an annular eclipse in other parts of the USA
Once in a while you also get a solar eclipse. Partial eclipses are fairly common but total eclipses are very rare for any fixed geographic location. The next total solar eclipse visible from the USA will be on August 21st 2017, so get ready for it! Maximum duration of totality (over 2.5 minutes) will be in parts of Kentucky. Much of the rest of the USA will see a partial eclipse on that date. A little sooner is an annular solar eclipse (where the moon is smaller than the sun and so won't cover it all) which will take place on May 20th this year (2012) and will be visible as annular from parts of several western states from Texas to California. Aberquerque New Mexico will get a good view. Much of the rest of the USA will see it as a partial eclipse, though the sun will have set on the East coast at the time of the eclipse and so it will not be visible from the eastern seaboard.
Photography of a total eclipse is a complex subject since brightness varies so much between the partial and total phases. If you have the chance to see a total solar eclipse you should visit one of the websites devoted to eclipse viewing and photography, such as the NASA website at http://eclipse.gsfc.nasa.gov/SEhelp/eclipsePhoto.html
While it should go without saying, I'll say it anyway. It's not safe to look directly at the sun unless you are looking through a filter which is designed for safe solar viewing. You can damage your retina looking directly at the sun with the naked eye and you can do even more damage looking at the sun through a telescope. You can also damage your camera unless you have a proper solar filter over the lens before pointing it directly at the sun.
The Planets
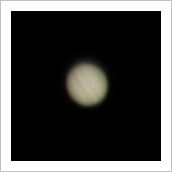 Planets are tiny (angularly speaking). The only planets you have any real hope of photographing as disks are Venus, Mars, Jupiter and Saturn. Venus is really tricky because it can be so bright and has no easily discernible surface features. All you see are the tops of the cloud layers which are brilliant white. Images of Venus will show up every trace of chromatic aberration in your lens! Venus shows phases like the moon, and that's what you may be able to capture. It can be the largest angular diameter planet, reaching as much as 66" (arc seconds) at its largest (the moon and sun measure about 1800 arc seconds or 1/2 a degree). This is followed by Jupiter at 50" maximum, Mars at 25" maximum and Saturn at 20" maximum. To put these numbers in perspective, each pixel of an EOS 7D with a 1000mm lens attached covers about 1". So the largest image a Jupiter you will see will only be 50 pixels wide, and the largest Mars can ever be is only 20 pixels wide. The image of Jupiter on the left is around 40 pixels wide. There is clearly no room here or missed focus or image trailing due to long exposures.
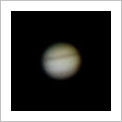 The image of Jupiter above on the left was taken using a 500mm f4.5 lens with a 2xTC and exposure was around 1/50s at f9 at an ISO 400 setting on an EOS 7D. It shows the two major equatorial belts quite clearly, with other features (like darkening towards the poles) visible but subtle. Changes in the appearance of the planet over time can be recorded. For example the image of Jupiter on the right was taken two years ago in 2010. You can see that one of the equatorial belts was much darker in color and more prominent than it appears now.
The planets are very small targets, so you're not likely to be able to record many surface details using a normal camera and lens. You may record some of the dark bands on Jupiter, the rings of Saturn (see image on left) and perhaps the polar caps of Mars when it's at its closest to earth. The image of Saturn was recorded at 1/25s at f9 and ISO 400 with a 1000mm lens (500mm + 2xTC). You can also record the positions of Jupiter's brightest 4 moons by overexposing the planet itself and/or by manipulating the image histogram. an exposure of 1/25s at ISO 800 and f9 should be enough to record the moon's positions, especially if you shoot RAW and add +2 exposure in DPP. You can then blend a properly exposed image of the planet with an overexposed image of the planet showing the moons and create an image like the one below.

Jupiter and moons (from left to right: Europa, Ganymede, Io and Callisto). 1000mm lens
The moons can be identified using a website such as http://www.skyandtelescope.com/observing/objects/javascript/jupiter which provides a real time prediction of the moon positions for any given time and date.
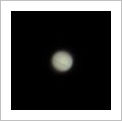 Of course not everyone has an expensive telephoto lens. A current 600mm f4 lens like the Canon EF 600/4L IS II USM sells for around $12,000 and even a used 500mm f4 lens that's 10-20 years old still commands a price in the $5000 region. However you can use much cheaper lenses and still get reasonable results. For example the shot of Jupiter on the left was taken with a Tamron 500mm f8 mirror lens (1/30s, ISO 100, f8). Mirror lenses work well for astrophotography since they are small and light and can be found at reasonable prices. Many (in fact most) telescopes use mirrors rather than lenses. Mirror lenses have low (or no) chromatic aberration and their drawbacks such as undesirable artifacts in the out of focus regions of an image don't matter since everything in the image will be in focus. Used lenses like the Tamron 500/8 SP (which is one of the better mirror lenses) can be found for a few hundred dollars. I don't know how well the really cheap (~$150) generic brand mirror lenses would work for this application.
The stars (and everything else...)
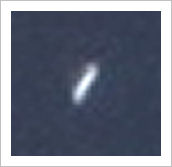 As I said at the beginning of this article, I'm not going to deal in any depth with star trail photography. With a fixed tripod that presents some problems since exposures must be short to prevent star trailing and stars don't appear to be very bright, so it's hard, but not impossible, to get good images. For example on the left is a 600% crop from an image shot with a 24mm lens and an exposure of about 20s. If you look at the table at the start of this article you'll see that 20s is given as the maximum exposure if you want stars to appear as points in a small print. However it's obvious that close up, those "points" are in fact short trails. Looked at closely, the trail is about 10 pixels long and 2 pixels wide. That means we'd need an exposure 5 times shorter, or about 4 seconds to see no trail and the initial table here suggested 2 seconds to be safe and to theoretically be below 1 pixel of movement. So we're obviously not going to collect a lot of light in that time.
Photographs of the stars are a pretty severe test of a lens. Typically any lens shot wide open will show vignetting (darker corners) and star images away from the center of the frame may be smeared (astigmatism and coma) as well as show some color fringing (chromatic aberration). For the best quality images a lens may need to be stopped down by a stop or two from wide open. This means that faint stars won't be recorded, but the image quality of the brighter stars will be higher.
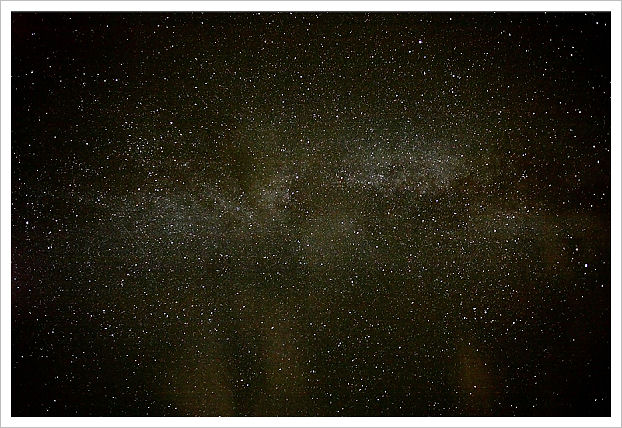
Section of the Milky Way. 20s exposure at f4, ISO3200 with a 24mm lens under dark skies (image cropped)
There are a few of ways to maximize light collection and record faint stars. One is to use a lens with a wide physical aperture. Another is to use a high ISO setting (though that brings along noise issues). A third is to stack together a large number of properly aligned short exposures using software such as Registax as I described earlier in this article. Stacking multiple images lowers background noise (which is random) but adds together pixels which are the images of stars. In most city and suburban environments the length of exposures may be limited by the brightness of the sky due to artificial light sources (street lights, building lighting, advertising signs etc.) as much as by stars trailing as is shown in the example below:
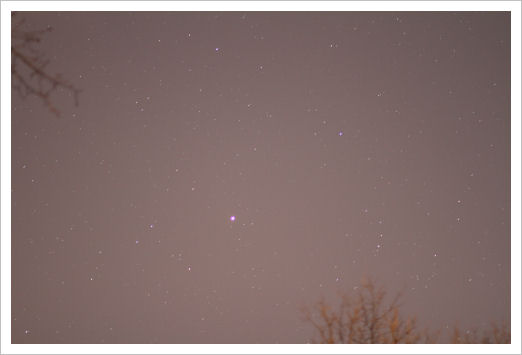
Sky fog. This is a shot of the southern sky from a point in New Jersey about 25 miles west of New York City
Exposure was just 10 seconds using an 85mm f1.8 lens at f1.8 and an ISO setting of 800
From time to time you may see streaks on star field images. The unwanted cause of these are often aircraft, but they can also be caused by meteors or orbital spacecraft. The website http://www.heavens-above.com has visibility predictions for objects in earth orbit (including the Hubble Space Telescope and the International Space Station). It also has information on the position in the sky of the Sun, moon and planets as well as a chart of what stars will be visible in the night sky from anywhere on earth for any time, day and year.
If you live in high northern or southern latitudes you may be fortunate enough to see the aurora caused by charged particles from the sun caught by the earth's magnetic field and interacting with the earth's atmosphere. These can be photographed with a static camera. Exposures can run from seconds to 10s of seconds using moderately fast lenses (f2.8-f4) and low to medium ISO settings (ISO 100-800) They do move around, so extended exposures are neither necessary nor desirable.
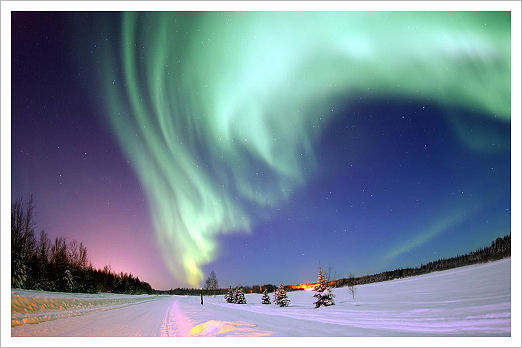
EIELSON AIR FORCE BASE, Alaska -- The Aurora Borealis shines above Bear Lake
Air Force photo by Senior Airman Joshua Strang. Public Domain image.
Telescopes
While normal photographic lenses can be used for astrophotography, telescopes are generally better for work with the sun, moon, planets and small deep sky objects (galaxies etc.). There are several reason why this is the case. The main reason is that telescopes are often cheaper than equivalent telephoto lenses because they don't need to be optimized for a large flat image field. They're also often of longer focal length because they generally don't need fast optics. They also don't need focusing motors or variable aperture. This means they can be both mechanically and optically more simple than camera lenses. Most lower priced telescopes use mirrors rather than lenses, which allows the use large diameter optics since mirrors are much cheaper than equivalent sized refractive lenses. While they have central obstructions just like camera mirror lenses, you don't need to worry about bokeh with a telescope!
For the price of a rather modest telephoto camera lens you can get a telescope with a tripod and a computerized controller which will let you find and track sky objects automatically. Attaching a camera is normally a simple matter of getting the right adapter for your camera. Such adapters are usually quite inexpensive ($25-$50). If the astronomy and astrophotography bug bites you, you might want to consider buying a small telescope. Here are a few good choices for starter scopes:
Navigation
